Random Password Generator
In my quest to learn a little about JavaFX desktop applications, I have spend some time w. the TornadoFX, and made a little cross-platform desktop app to generate secure random passwords.
In my quest to learn a little about JavaFX desktop applications, I have spend some time w. the TornadoFX, and made a little cross-platform desktop app to generate secure random passwords.
When installing an Ubuntu based distribution (KDE Neon in my case), I always add the following extra package archives. This list is a reminder for me, but you might find it useful. sudo apt-get install software-properties-common sudo add-apt-repository ppa:lyzardking/ubuntu-make sudo add-apt-repository ppa:seafile/seafile-client sudo add-apt-repository ppa:libreoffice/ppa sudo add-apt-repository ppa:phoerious/keepassxc sudo add-apt-repository ppa:webupd8team/atom Update the package index … [Read more…]
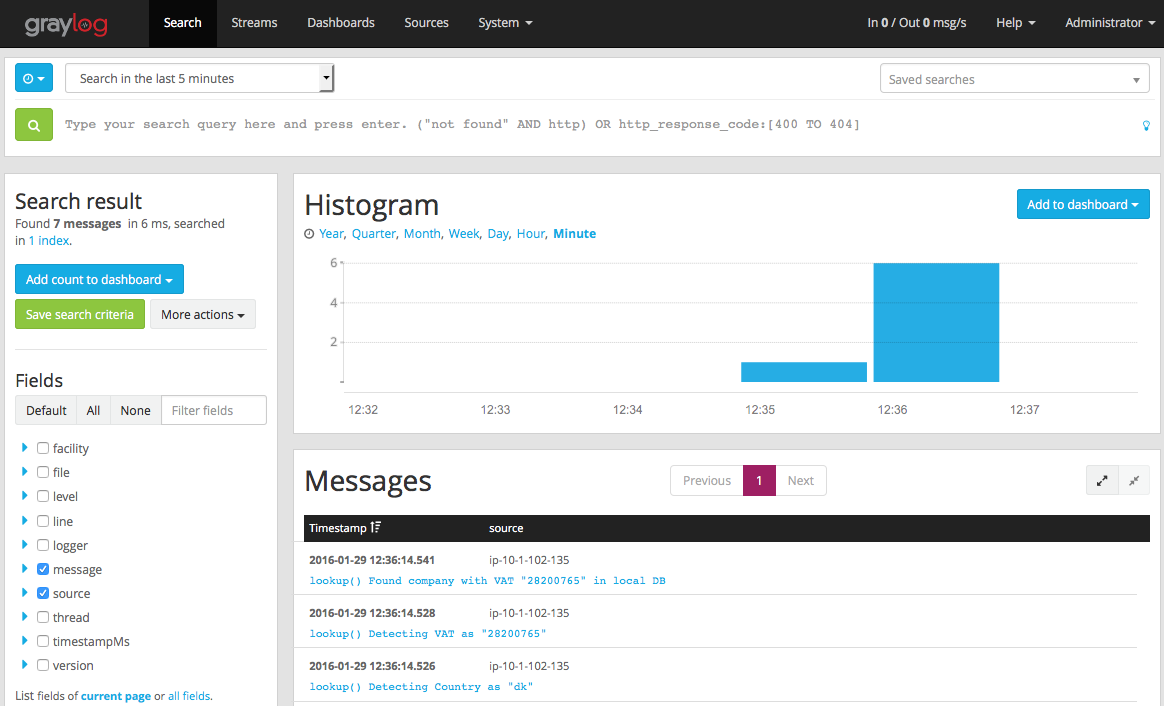
I have a small Grails (2.5.x) web-application running on the AWS Elastic Beanstalk service. This works really well, but accessing log-files and debugging errors can be difficult. Therefor I decided to send some of the logging to a remote Graylog server (hosted elsewhere at the moment, but could just as well be running on an … [Read more…]
In my quest to become a better Grails developer, I have started to build a basic and free trouble ticket – / support – / helpdesk system, from the ground up. It’s not intended to compete with the big systems, but might fit in where less features are required. It supports receiving and sending emails, … [Read more…]
Convert your ISO image into a Mac native disk image: hdiutil convert -format UDRW -o my-file my-file.iso Insert a USB stick into your Mac and get the device path by running: diskutil list In my case it’s /dev/disk2. Please take extra care when identifying the USB disk, as you might otherwise delete your entire harddrive! … [Read more…]
One of my favorite OSS tools is BURP (short for BackUp and Restore Program). Backup is perhaps the single most important task you must deal with when working with It systems and data.
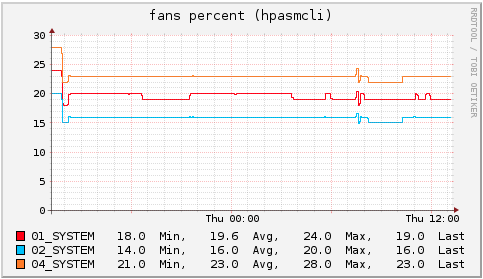
If you have the hpasmcli command installed on your ProLiant server (available from the HP ProLiant Support Pack), you can display the speed of fans and the temperature of different parts of your server and use collectd to store the values. The following has been tested on a ProLiant ML350 G6 server. On Debian you … [Read more…]
If you haven’t bought all the x-mas presents yet, or want something to read during the holiday, then take a look at Packts $5 eBook offer!
I have backported burp on Debian Squeeze 6.0.10 amd64 as of today. Original from Burp-1.3.48-4~bpo70+1. burp_1.3.48-4~bpo70+1~bpo60+1_amd64
Use the OBD II scanner and diagnose the code with the following list: Note that this list applies to any car that uses the ODBII system P0010 A Camshaft Position Actuator Circuit (Bank 1) P0011 A Camshaft Position – Timing Over-Advanced or System Performance (Bank 1)) P0012 A Camshaft Position – Timing Over-Retarded (Bank 1) … [Read more…]